|
Tessellation by Glide Reflection
Polygons that can be used:
Any kite
Symmetry:
Translational symmetry
Glide-reflection symmetry
Technique:
1) Draw your beginning polygon. For this tessellation, a kite will be used (see Fig. 1).
2) Use the pencil to draw a line design from one vertex to another along the top side.
See Figure 1.
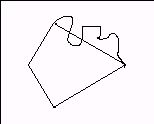
Figure 1
3) “Lasso” the line design to select it. Copy it and paste a copy. In
TRANSFORMATIONS, use FLIP HORIZONTALLY to flip the copy. Move the copy so it lines up with the bottom side
(Figure 2).
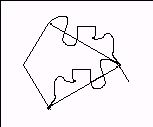
Figure 2
4) Repeat steps 2 and 3 for the top left side (flipping horizontally and moving a copy to
the lower left side), and any other pairs of opposite sides you have, until your piece
is done (Figure 3).
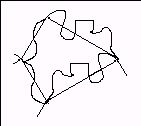
Figure 3
5) Erase the lines of your original polygon (in this case, the parallelogram) and any
other extra lines so only your design can be seen. You now have a tessellating piece. Add any details with pencil at this time. You may paint the figure now, or
wait until you are done tessellating to paint the figure different colors
(Figure 4).
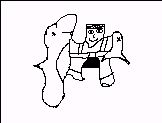
Figure 4: Man with caught fish Figure
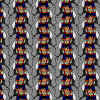
6) “Lasso” your entire piece to select it. Copy it and paste a copy. Flip this copy
horizontally and move (translate) the copy so it fits into the original like a puzzle
piece (see Figure 5). You now have a “double” piece that you do not need to flip.
(You may wish to color the “double” two different ways at this time.) “Lasso” the
“double”, copy it, then paste and move into place as many as needed to
fill up the screen. (To get pieces to fit off the sides you may need to pick up the
piece near its sides.) See completed tessellation.
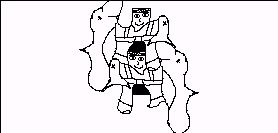
Figure 5:”Double Kite”
|

