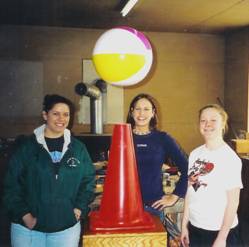
Building the Balancing Ball Exhibit
Materials needed:
1 37" x 25-1/2" piece of 5/8" plywood
2 19-1/4" x 18" pieces of 5/8" plywood
2 25" x 18" pieces of 5/8" plywood
2 37" 1x4s
2 25-1/2" 1x4s
4 8" 2x4s
2 19-1/4" 2x4s
5 17-1/2" x 16-3/4" pieces of 5/8" plywood
3 25-1/2" 2x4s
1 25" x 19-1/4" pieces of 5/8" plywood
1 36" tall traffic cone
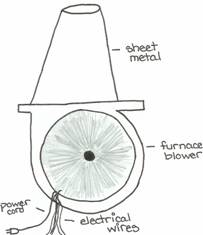
1 fan (shown in drawing to the right)
1 window or door screen
electric switch and switch plate
nail gun and nails
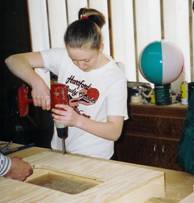
drill and screws
polyurethane
paintbrush
electric sander and sandpaper
staple gun and staples
12" beach ball
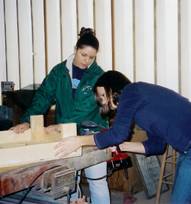
We got the idea from this exhibit from Recipe # 83 from Exploratorium Cookbook #2. After viewing their instructions on how to build the exhibit, we decided to build a Bernoulli Blower in a different way. Mr. Radke helped us come up with the construction plan for our exhibit.
Construction:
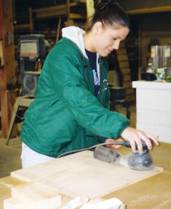
1. Sand all of the pieces of wood down with the electric sander (ordinary sandpaper will work as well).
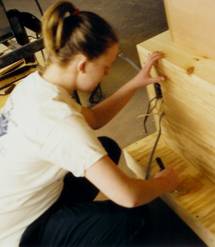
2. Assemble the 1x4s in a rectangle to form the skirt of the base and nail them together with the nail gun.
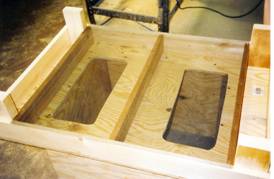
3. Cut two 15" x 8" rectangles in the 37" x 25-1/2" wood base piece to allow intake of air trough the base. Attach the base piece to the skirt with screws.
4. Flip the base over and attach the 8" 2x4s in the corners of the base with screws. They will serve as legs for the apparatus.
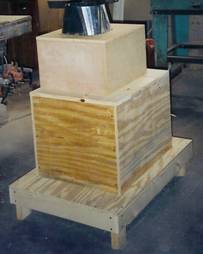
5. Take the 19-1/4" x 18" and 25" x 18" pieces of plywood and assemble them in a rectangle, fastening them together with screws. Attach this structure to the base with screws as well. This will serve as the housing for the fan.
6. With the base flipped over, place the 3 25-1/2" 2x4s inside it as shown in the picture below. Secure them with nails. These pieces will support the screen that will be attached.
7. Attach the screen to the bottom of the base with staples, going only as far as the legs of the base. Trim away any excess screen.
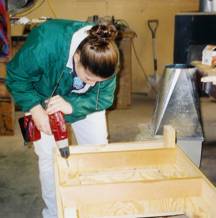
8. Flip the base over and fit the two 19-1/4" 2x4s inside the fan housing as shown in the picture below. Secure them with screws. These will support the fan and hold it upright.
9. Place the fan into the housing, resting it on the supports. Make sure to cut a rectangle out of the housing for the switch and switch plate, as well as a hole for the fan's electrical cord.
10. Cut a hole for the top of the fan to poke through in the 25" x 19-1/4" piece of plywood. Set it aside. It will be the top of the fan housing.
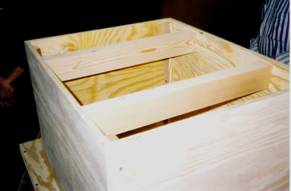
11. Assemble four 17-1/2" x 16-3/4" pieces of plywood in a square and attach them with nails. Take this structure and attach it with nails to the piece of plywood set aside in the previous step. Nail the newly formed structure to the fan housing.
12. Take the fifth piece of 17-1/2" x 16-3/4" plywood and cut a hole in it for the top of the fan to fit through. Attach this piece to the top of the apparatus with nails.
13. Sand down all the edges of the apparatus with sandpaper.
14. Brush on polyurethane with a paintbrush to preserve the wood and give the project a finished look.
15. Cut the traffic cone down so that the top opening has a 3-1/2" diameter. Set the cone on top of the apparatus. You may attach the cone to the top of the structure, but it is not necessary. It will be easier to make any needed repairs if you do not attach the cone.
16. Attach the exposes wires of the fan to an electrical switch and attach the switch to the fan housing. You may want to seek the help of someone who knows electrical wiring well to help you with this step. Cover the switch with a switch plate.
17. Plug the fan in and test your creation! Flip the switch and place the beach ball in the air stream and have fun!
Special thanks to Mr. Don Radke and Mr. Brian Behnke for all their help in the construction and planning of this project.
To view our research page, click here.
To view our sign page, click here.