
Before
starting the Pringles can kaleidoscope, our group went shopping to buy all the
supplies needed for the scope (see budget).
First, we happily ate all of the Pringles in the can. Then, we took some warm, soapy water and thoroughly
cleaned out the inside of our can, which served as the base for our scope.
Before
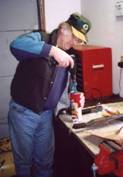
we started building our scope, Natalie’s dad graciously helped us make a
viewing hole in the metal end of the can. He used a drill to create a small
hole in the center of the metal circle (Figure 1). To smooth out a few rough spots, he used
sandpaper.
Following
this procedure, we placed three pieces of pre-cut Plexiglas, 9 inches by 2 ½
inches, onto black construction paper.
After tracing around their edges, we cut out the three strips of black
paper. One piece was cut for each piece
of Plexiglas.
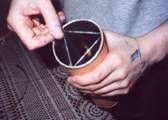
Carefully,
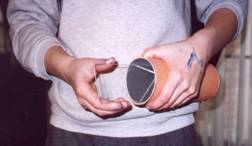
we first arranged the three pieces of Plexiglas inside the can to make an equilateral
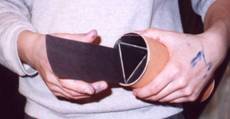
triangle (Figure 2). Then, we slipped a
strip of black construction paper behind each glass piece (Figure 3). When all three Plexiglas pieces were inside
the can, with the black paper behind each piece, we obtained a symmetrical
reflection. This reflection had the same
effect as though we had used real mirrors.
Next,
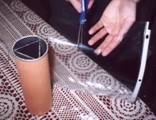
we needed to make a clear platform on top of the glass, inside of the can. To do this, we traced the bottom of the can
onto a clear, plastic file folder (Figure 4).
Once we had this circle cut, we trimmed it down to fit just inside the
rim of the can (Figure 5).
After
the clear circle was made, we cut off a thin strip, about 5 inches long and ½
inch wide, from a cardboard box. We
worked with this piece of cardboard to make it more flexible. This strip fit inside the inner edges of the
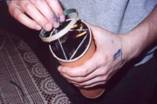
can. Once we were able to make this
cardboard touch around all the edges, we taped the ends to form a ring. This ring simply rested on top of the clear
circle, already inside the can (Figure 6).
Figure
6 Figure 7 Figure 8
Now
with the base completed, we needed confetti to put in the end of the can to create
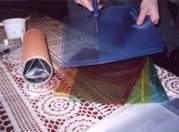
colorful designs and patterns. We used
transparent, but colored file folders, and cut them into thin strips (Figure
7). These strips were then cut into
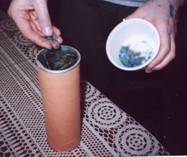
small, square shapes. After we had small
pieces cut from red, yellow, blue and green file folders, we gathered them up,
placing the pieces on top of the clear circle, inside the cardboard ring
(Figure 8). We pressed the plastic
Pringles lid back on top of the can. By
doing this, the confetti pieces would not fall out (Figure 9).
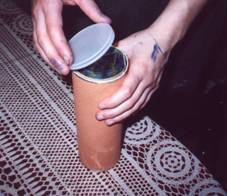
Figure 9
Finally,
we had to finish the outside of our kaleidoscope. We took a plain piece of orange construction
paper, trimming it to fit the size of the can.
Once we had the paper sized up to the outside of the can, we spread glue
stick on the back. Neatly, the orange
construction paper was glued around the can, as shown in Figure 9.
We held our new kaleidoscope up to the light, turning the scope to see different patterns develop. However, to change the shapes and designs, we used various types of confetti. Keep in mind, it does help if the confetti is transparent, although this is not crucial. Simply, take out the confetti presently in the scope, replacing it with the confetti of your choice. Maybe you have some confetti lying around at home that you have put in Christmas or birthday cards, such as, Christmas trees, stars, or balloons. Whatever confetti you decide to use, unique patterns will magically appear!