
After
making a list of supplies and shopping for our materials (see budget), we were
able to begin building our giant kaleidoscope.
We placed newspaper on the driveway outside, before spray painting the
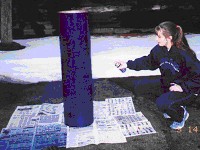
exterior of our cardboard tube. A few
cans of spray paint later, we had our tube completely painted (Figure 1).
While waiting for the tube to dry, we started preparing the pieces for the inside of our giant scope. Using our pre-cut Plexiglas pieces, four feet long and 10 3/32 inches wide, we traced three rectangular pieces out of styrofoam (Figure 2). When the tracing was done, these three styrofoam pieces were cut with precision.
|
|
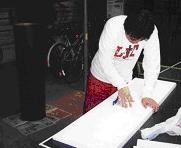 |
| Figure 1 | Figure 2 |
Next, we had to cut three
pieces of black poster board, the size of the glass. We used duct tape to attach these sheets of black poster board to
one side on each piece of styrofoam.
While
the paint on our scope was drying, we took wooden embroidery circles and
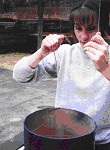
stretched clear plastic over the top of each circle. We arranged stickers, confetti, and glitter on the plastic. These circles would be used later, on the
end of our giant scope. Totally, we had
three circles. Thus, our giant kaleidoscope
became more interactive.
The
paint on our tube finally dried. We
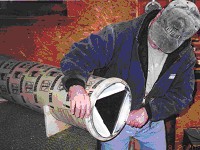
strategically placed the Plexiglas pieces inside to form an equilateral
triangle with a 60-degree angle in each corner (Figure 3). We put a piece of styrofoam behind each
piece of glass with the black poster board side facing the center of the tube.
On the end, where our clear, plastic circles will be placed, we taped black poster board to hide the styrofoam. Yet, the paper did not protrude inside the triangle. This made the end look complete and finished.
 |
 |
| Figure 3 | Figure 4 |
After
the main elements were inside of the tube and the rotating circles were
designed, we worked on the end of our scope.
However, this task was a bit more difficult to figure out; therefore, we
had the help of Natalie’s uncle, Leo.
We needed something to turn our clear, embroidery circles at the end of
our scope. With much thought and a
great deal of handiness from Leo, we came up with the following formula. Leo placed a tin sheet on the end of our
scope. He bent the tin over towards the
inside so the sharp edges would not cut the plastic when the circle
rotated. Then, he cut out a wooden lip,
and slid this over the tube, so the circular disks would have something to rest
up against when placed on the end of our scope (Figure 4). To add a finishing touch, Leo also made two
wooden legs for our scope to rest upon.
One of these legs is apparent in Figure 4 as well. Now, our scope would stay balanced and
stationary.
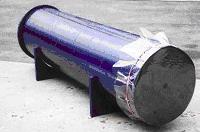
Lastly, for the viewing end of our scope, we cut out a large, black circle from poster board. In the middle, we created a viewing hole by cutting out a small circle with an exacto knife. After this piece of poster board was placed on the end of our scope, we put some clear plastic over the top, fastening it down with rubber bands (Figure 5).
 |
 |
|
Figure 5 |
Figure 6 |
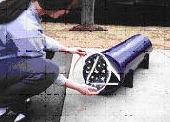
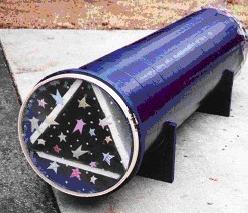
Finally, we placed one of the clear embroidery circles, onto the end of our giant kaleidoscope (Figure 6). We were ready to look into the black hole of the kaleidoscope and view a magnitude of colorful illusion (Figure 7)! Indeed, a fascinating and fun creation!!
 |
|
Figure 7 |