THE INSTRUCTIONS
How to make a hologram


"Holography is now so simple it can
be taught at any grade level."
- Dr. Tung H. Jeong
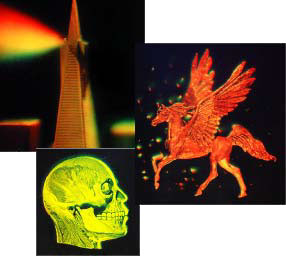
In the past, creating holograms has been an expensive, complicated project. The laser alone could cost hundreds of dollars. But now breakthrough research has produced a new way to make holograms using inexpensive laser diodes and a simple set up. The Holography Laser we used is specially modified expressly for the application of creating holograms. Holography has never been this easy. Even high school students can make beautiful holograms with this simple 8-step process:
1. Set up the system on the Holography Table
2. Use a holography safelight to provide minimal visibility after dark adaptation.
3. After warming up for a few minutes, the laser will produce light with a constant wavelength.
4. With the elliptical beam in a horizontal orientation, arrange the system so that the object is illuminated as evenly as possible.
5. Block the beam near the laser with a "shutter," such as an index card, to prevent light from reaching the object.
6. Place a holographic plate in contact with the object (on the same side as the laser), with the emulsion (sticky) side facing it. Make sure the film will not move during exposure.
7. After a settling time of a few seconds, make an exposure of 5 seconds by lifting and lowering the "shutter."
8. Develop the film according to the instructions in the chemical kit. After development, the dried hologram can be viewed with a pen flashlight or any incandescent point source.
Since we had never tried holography before, Arbor Science developed this beginner's kit just for us and anyone else with similar goals and expertise in the holographic field. With this new Simple Holography Kit, we got most of the equipment we needed to make holograms, including the laser and an ideally sized pewter object, for only $185! All we need to do is determine the amount of film and developing chemicals we needed for our project. Arbor Sciences’ Simple Holography Kit took care of the rest for us. The kit included Holography Laser, 12" x 24" holography table, holography safelight, film holder, pewter object, 5" x 7developing trays, and detailed instructions.
Holography Supplies
In addition to the kit, we recommend that anyone else who would like to develop holographic art has a complete darkroom that can be left undisturbed for long periods of time. We also had the use of large glass flasks (1500 mL), safety goggles, aprons, developing trays, and paper towels. We obtained these from our Chemistry laboratory and most Chemistry laboratories should offer similar products.
Holography Safelight
This was simply a green light that offered a little bit of illumination for our dark room work without destroying our hard holographic work.
JD-4 Developing Chemicals (for 45-60 film plates)
&
Pack of 30 PFG-03 Film Plates (2.5" x 2.5")
IMPORTANT TO NOTE: THE KIT WE PURCHASED DID NOT INCLUDE THIS. THIS WAS A SEPARATE PURCHASE.
JD-4, A New Way to Process PFG-03M Plates and Film. The latest line of continuing improvements! We selected PFG-03 film and JD-4 developing chemicals for Simple Holography because of the short exposure time. It is well known that PFG-03M emulsion records the brightest and clearest reflection holograms. In the past, the only way to develop the emulsion is by using GP-2.
The draw back with this combination is two-fold: (1) the sensitivity of PFG-03M is 1.5 millijoules per square centimeter (mj/cm2), this means very long exposure time even while making a simple reflection hologram; and (2) the one-step development, while simple, takes 12 to 15 minutes. Furthermore, the developed hologram must be dried naturally, which often takes over an hour.
The above short-comings makes it difficult to use PFG-03M in lecture demonstration, workshops, or student laboratory exercises because the hologram must be completely finished in a relatively short time.
JD-4 is a newly discovered processing regime for the PFG-03M emulsion. It’s main features are: (1) it increases the sensitivity of PFG-03M to the same level as PFG-01, i.e., the exposure time can be one-tenth as long as before; and (2) the exposed hologram can be developed in 20 seconds and bleached in less than one minute. Also, the finished hologram can be quick-dried using warm air.
Furthermore, JD-4, compared to any other processing regimes, uses chemicals with lowest toxicity and volatility. Its main developer is ascorbic acid and its main bleach is copper sulfate. These chemical are dangerous and should be handled with care.
Using the PDF-03M and JD-4 combination, one can now make bright and clear reflection and transmission holograms using low output lasers, such as a diode laser from Integraf, and finish the experiment within a short time.
In case you are interested in purchasing the previously described product here is some information about it. Overall we were happy with the results of this product and we recommend it to all first-time holographic artists. The PFG-03M materials are distributed by INTEGRAF (Phone (847) 234-3756).
Description Cat. No. Price
1 liter 04-3040 $16.95
Holography Table
Our holography table was designed by Thomas Altman. It is an alternative to clumsy and expensive sand tables or inner tube tables which used to be the gold standard. It is a rigid 12" x 44" board is covered with black formica, edged in black, and isolated from vibration with black rubber stabilization spheres.
Holography Castle & Other Objects
One of the critical steps in producing a good hologram is selecting the right object. Reflectivity and depth are very important. We chose this pewter castle because it provides an excellent image. Other objects we chose included a golf ball and a ‘Homie’. Each of these had varying success and we had at least one successful exposure for each.