Duck
Into a Kaleidoscope
Construction Directions
Note: These directions are adapted from those given in the Exploratorium Cookbook Recipe # XXX.
|
Materials and Costs |
||
| Item: | Cost: | Source: |
| 4' Door Mirrors (3) | $ 5.00 each | Kmart |
| 2x4 Boards | ||
| Wood Backing | ||
| Epoxy | Menards | |
| What would it be like if every one looked the same? What if you took a look around, and saw hundreds of people with your face looking back at you? That is what it is like to step into a kaleidoscope. How can someone make such an interesting phenomenon? Keep reading, and you'll find out. |
|
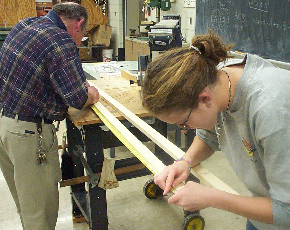
The first step in making the kaleidoscope
is to make the frame for the three mirrors to fit into. Six boards are
cut 48 inches long from the inside edge of the board. The edges should
not be cut square. In order for the sides to fit into the shape of an
equilateral triangle, the connecting edges need to be cut at 30
degrees. The six boards form the top and bottom of the frame to hold the
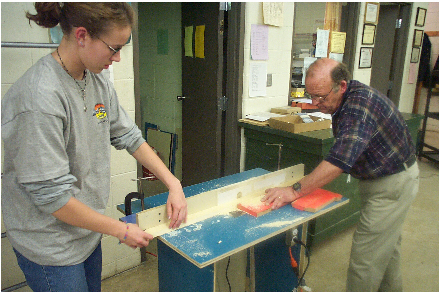
mirrors. A router is then used to cut an edge that is the width of the mirrors in each of the six frame boards. The three boards that form the top of the frame are then routed on the bottom edge, and the boards that form the bottom of the frame were routed on the top. This routed edge forms the lip that the mirrors will sit on. |
|
|
The next part to the frame would be to make braces to connect the top and the bottom of the frame together. Six boards should be cut 11 1/4'' long. All of the edges for these are square. The braces are screwed to the inside edges of the frame using 1 1/4'' drywall screws. The braces are 16'' apart. They are also used to have more surface area to anchor the mirrors to. |
|

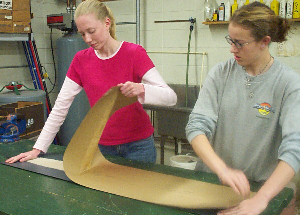
| The mirrors need to be prepared so they can be placed into the frame. They may need to be cleaned. In our case, the frames in which the 4' by 1' mirrors came in needed to be removed. There was also a cardboard backing which needed to be removed. |
|
|
|
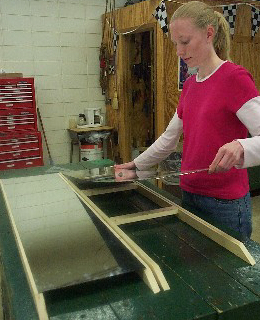
The mirrors are then ready to be secured in the frames. Epoxy is then mixed (the 30 minute setting kind works well), and spread over all of the surfaces that will touch the mirror (that includes the frame and the braces). The mirrors are then put into place, and the screws holding the braces are tightened to keep the mirror from moving. When the screws are tightened, there is usually a small amount of epoxy that squeezes onto the mirrors. Wipe the wet epoxy off with a dry paper towel, and then clean with a wet paper towel. |
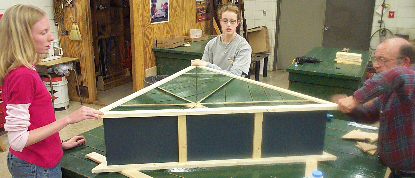 |
The three sides of the triangle are then brought together with the mirrors facing toward the inside. The tops of the frame are screwed together at the vertices using 1 1/4'' screws and small equilateral braces. The same is done for the bottom of the frames. | 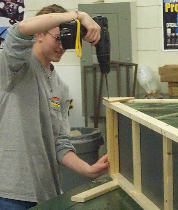 |
|
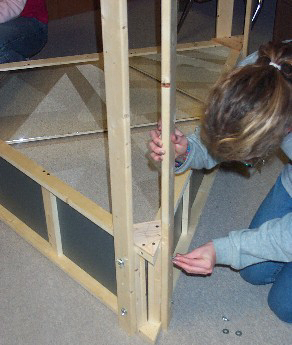
The next major step in the process is to add the legs. To make it easier for storage, the legs will be made so that they are detachable. First, leg anchors need to be screwed into the frame, so that there is a strong support for the legs to attach to. These anchors are 11 1/4'' long and are screwed in at the vertices. In order to attach the 6' legs to the leg anchors, double
threaded studs were screwed into the leg anchors. The legs then have 2 holes
drilled in them that would fit the studs. The double threaded screws fit through the holes and the
legs are tightened by washers and wing nuts. |
 |
Duck Into A Kaleidoscope
Research Page
Return to Duck Into A Kaleidoscope
Home